Co-op Commander Guide: Raynor
Renegade Commander
Sections on this Page
Commander Summary
Raynor overwhelms enemies by using his Orbital Drop Pods to quickly reinforce his armies on the battlefield.
Level Unlocks
| Level/Icon | Name | Description |
|---|---|---|
 |
Rapid Recruitment |
Raynor trains combat units and builds Barracks 50% faster. Mechanical units cost 20% less gas. Stimpack grants increase bonuses, costs less life, and does not require research. |
 |
Banshee Airstrike | Unlocks the ability to call down cloaked Dusk Wings with timed life, dealing damage to the target area upon arrival. Call down Banshee Airstrike from the top panel. |
 |
Nano Projectors | Increases the Firebat attack range and Medic heal range from 2 to 4. |
 |
Infantry Upgrade Cache |
Unlocks the following upgrades at the Barracks Tech Lab:
|
 |
Hyperion: Point Defense Drone | Enables the Hyperion to deploy defensive drones that shoots down enemy missiles. Call down the Hyperion from the top panel. |
 |
New Unit: Battlecruiser |
Powerful warship. Can use Yamato Cannon and Tactical Jump. Built at the Starport. Can attack ground and air units. |
 |
Battle Bunkers | Equips bunkers with automated turrets that attack ground and air units. Increases the life of bunkers from 400 to 550. |
 |
Orbital Drop Pods | Barracks, Factory, and Starport units are delivered directly to the structure's Rally Point |
 |
Factory Upgrade Cache |
Unlocks the following upgrades at the Factory Tech Lab:
|
 |
Vanadium Plating | Armor upgrades at the Armory and Engineering Bay increase the life of affected units (by 10%) in addition to increasing their armor. |
 |
Armory Upgrade Cache |
Unlocks the following upgrades at the Armory:
|
 |
Orbital Depots | Allows SCVs to instantly deploy Supply Depots from orbit, eliminating their construction time. |
 |
Starport Upgrade Cache |
Unlocks the following upgrades at the Starport Tech Lab:
|
 |
Hyperion: Advanced Targeting Systems | Increases the damage dealt by friendly units near the Hyperion by 2. Call down the Hyperion from the top panel. |
 |
Mercenary Munitions | Increases the attack speed of Raynor's combat units and calldowns by 15%. |
Highlighted rows denote large power spikes for the commander.
Achievements
The commander-specific achievements for Raynor are:
| Achievement | Name | Description |
|---|---|---|
 |
Feels Good, Man | Heal 10,000 life on allied units in Co-op Missions. |
 |
Hyperactive | Kill 25 units with a single Hyperion calldown on Hard difficulty with Raynor. |
 |
Hyperion Alert | Kill 500 units with Raynor's Hyperion in Co-op Missions. |
 |
The Thunder | Kill 25 units with a single Air-Strike on Hard difficulty. |
Calldowns
The calldowns for Raynor, at level 15, with no mastery points added are:
| Calldown | Name | Description | Recommended Usage | Numbers |
|---|---|---|---|---|
 |
Banshee Airstrike | Calls down 5 cloaked Dusk Wings, dealing 50 damage to enemies in the drop zone. Dusk Wings are controllable and will fight for 60 seconds. |
|
|
 |
Hyperion | Calls down the Hyperion Battlecruiser. The Hyperion is controllable and will fight for 60 seconds. |
|
|
The Hyperion ability brings a Hyperion onto the battlefield. This unit has abilities itself, shown below:
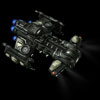
Hyperion
| Ability | Name | Description | Cooldown |
|---|---|---|---|
 |
Hyperjump | Hyperjump to the targeted location. | 15 seconds |
 |
Yamato Cannon | Blasts a unit with a devastating plasma cannon, dealing 600 damage to it and nearby enemies. | 15 seconds |
 |
Point Defense Drone | Uses a laser to shoot down enemy missiles. Cannot target special attacks. Times out after 180 seconds. Each shot consumes 10 energy. (4 charges max) |
5 seconds |
Sub-Ascension Leveling
Difficulty: Moderate
Raynor plays the same way he does at Ascension levels when he is at lower levels. The only difference is that he is a lot slower, due to Supply Depots having a build time, as well as units not being able to be deployed directly onto the battlefield. Because of the latter, ensure the path between your army and your production is cleared to prevent your army units from being intercepted by enemy units.
While leveling through Mastery levels, allocate points with an equal split on Power Set 1.
Masteries
Below are the three Power Sets for Raynor with the recommended point allocations for each. Note that these are meant to serve a general, all-purpose build that is effective across all maps with no Prestiges selected. You are highly encouraged to change these masteries to suit your playstyle and particular challenges you face (e.g. Weekly Mutations).
Power Set 1:
| Power | Value | Recommended Points to Add | Further Considerations |
|---|---|---|---|
| Research Resource Cost | -2% per point -60% maximum |
15 | A careful balance is needed over here. Research cost reductions are great, but they are temporary. Once research is done, you won't be able to take advantage of the mastery. However, going for max unit speed can slow down getting research that significantly powers your army up. |
| Speed Increases for Drop Pod Units | 2% per point 60% maximum |
15 |
This depends a lot on the playstyle of the player. Research Cost Reduction can help with early game upgrades, while Speed Increases can make reinforcing units a lot more powerful.
Power Set 2:
| Power | Value | Recommended Points to Add | Further Considerations |
|---|---|---|---|
| Hyperion Cooldown | -4 sec per point -120 sec maximum |
0 | For players that prefer to have the much more powerful Hyperion more available at their disposal, the Hyperion mastery can be selected. On certain mutators, it might be better to have it present rather than the Banshees that die quickly. |
| Banshee Airstrike Cooldown | -4 sec per point -120 sec maximum |
30 |
The Banshee Airstrike Cooldown mastery is the better choice here. At maximum level, Banshees can be out on the battlefield for almost 50% of the mission time.
Power Set 3:
| Power | Value | Recommended Points to Add | Further Considerations |
|---|---|---|---|
| Medics Heal Additional Target | 3% per point 90% maximum |
? | This is purely a matter of what kind of build the player prefers to do. Medic heals don't really benefit Mechanical units greatly and thus, the mastery points are better spent on the Mech attack speed. |
| Mech Attack Speed | 1% per point 30% maximum |
? |
This depends on the playstyle. If going for a Mech build, the Mech Attack Speed is the better choice here. Otherwise, Medic Healing should be picked.
Prestiges
Below are the prestiges for Raynor. Note that "Effective Level" is the level at which the prestige achieves it full effect.
| Level | Name | Description | Effective Level | Notes |
|---|---|---|---|---|
| 1 | Backwater Marshal |
|
1 |
|
| This prestige increases the ruggedness of Raynor's army. If you have good micro, you might find this prestige to be particularly valuable. However, its disadvantage is a big one. You lose the ability to spawn-camp effectively using Vultures due to the lack of potentially high mineral income from MULEs. Remember that you will still need Orbital Command Centers for detection. | ||||
| Level | Name | Description | Effective Level | Notes |
|---|---|---|---|---|
| 2 | Rough Rider |
|
11 | None |
| This prestige is essentially a Stim-for-Mechs prestige. It can be particularly useful when playing under constrained resources, while also playing a Bio+Mech build. You may even combine this with the Mech Attack Speed mastery to get even higher DPS output out of your Mech units. | ||||
| Level | Name | Description | Effective Level | Notes |
|---|---|---|---|---|
| 3 | Rebel Raider |
|
6 |
|
| This prestige is particularly useful if you prefer to use air units and rushing Battlecruisers. The lack of tech requirements combined with the gas cost reduction makes Battlecruiser rushing a viable strategy. you may even combine this with the Hyperion cooldown mastery to be able to spam Hyperions much more frequently. | ||||
While Backwater Marshal can provide you with an overall army effectiveness increase, playing without a Prestige is generally better if you prefer Bio-style play, or Rough Rider if you prefer a Mech-style play.
Recommended Army Composition
The recommended army composition for Raynor is below. Note that this assumes no Prestige talent selected and recommended Mastery Allocations. This is a basic recommendation for your army framework. It is recommended to gain an understanding for each of the units in the Units section and further add tech units so that you are able to better handle the situations you face.

The Marine/Marauder/Medic army composition is a solid army composition for Raynor. Damage is dealt through cheap units like Marines, with a few Marauders to soak up damage. Medics provide the healing as well as damage reduction.
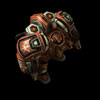
Add Firebats to the mix to provide extra splash damage (e.g. when dealing with Infested Units) or when you need to tank high amounts of damage (e.g. when dealing with Banelings).
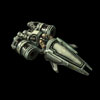
Add Vultures when you have access to enemy attack wave spawn locations to spawn-camp waves that primarily consist of ground units.
Combat Units
For more information on Raynor's unit stats, comparison between units and upgrade calculations, visit the Data Tables page.
Raynor's combat units are listed below:

Marine
- Should be the core of Raynor's army.
- Make them out of Reactor'ed Barracks.
- Extremely high DPS and versatile unit.
- Vulnerable to splash damage.
Skills:
| Skill | Name | Description | Cooldown | Energy Cost |
|---|---|---|---|---|
 |
Stimpack | Injects the unit with powerful stimulants that greatly increase attack speed (by 75%) and movement speed (by 50%) for 10 seconds. Injures the unit for 5 of the unit's life. | 0 seconds | 0 |
Upgrades:
| Upgrade | Name | Effect | Research Time | |
|---|---|---|---|---|
 |
Combat Shield | Marines gain +10 life. | 100/100 | 60 seconds |

Marauder
- Have a few in your army to deal with melee and armored units.
Skills:
| Skill | Name | Description | Cooldown | Energy Cost |
|---|---|---|---|---|
 |
Stimpack | Injects the unit with powerful stimulants that greatly increase attack speed (by 75%) and movement speed (by 50%) for 10 seconds. Injures the unit for 10 of the unit's life. | 0 seconds | 0 |
Upgrades:
| Upgrade | Name | Effect | Research Time | |
|---|---|---|---|---|
 |
Concussive Shells | Upgrades the Marauder weapons to slow down opponents movement speed by 50% for 1.5 seconds. | 50/50 | 60 seconds |

Firebat
- Useful on infested maps due to splash damage.
- Can be used against Swarmy and MutaLing Zerg compositions.
Skills:
| Skill | Name | Description | Cooldown | Energy Cost |
|---|---|---|---|---|
 |
Stimpack | Injects the unit with powerful stimulants that greatly increase attack speed (by 75%) and movement speed (by 50%) for 10 seconds. Injures the unit for 10 of the unit's life. | 0 seconds | 0 |
Upgrades:
| Upgrade | Name | Effect | Research Time | |
|---|---|---|---|---|
 |
Incinerator Gauntlets | Widens the Firebat's damage radius by 40%. | 50/50 | 60 seconds |
 |
Juggernaut Plating | Firebats gain +100 life and +2 armor. | 100/100 | 60 seconds |

Medic
- Must-have in your army, especially if going for a Bio-based build.
- Used to heal off the effects of Stim Pack as well as damage to your army.
Skills:
| Skill | Name | Description | Cooldown | Energy Cost |
|---|---|---|---|---|
 |
Heal | Heals a friendly biological target. Heals 9 life per 3 energy per second. |
0 seconds | 0 |
Upgrades:
| Upgrade | Name | Effect | Research Time | |
|---|---|---|---|---|
 |
Stabilizer Medpacks | Increases the Medic's healing speed to 12 life per 3 energy per second and allows them to heal mechanical units. Units being healed by Medics take 25% less damage. | 100/100 | 60 seconds |

Vulture
- Useful for spawn-camping enemy spawn points.
- Ensure you get the "Replenishable Magazine" upgrade to allow you to re-make Spider Mines.
- Can be used to take out ground-based unit objectives like the train on Oblivion Express.
- Deals low DPS and is very fragile, so keep them away from your frontline.
Skills:
| Skill | Name | Description | Cooldown | Energy Cost |
|---|---|---|---|---|
 |
Deploy Spider Mine | Spider Mines pursue enemy units that come in range, and detonate for heavy area damage. Buried Spider Mines can only be seen by enemy Detectors. (3 charges max). | 0 seconds | 0 |
 |
Replenishable Magazine | Constructs a new Spider Mine to replace those used at a cost of 15 minerals each. A Vulture can only carry 3 Spider Mines at a time. |
6 seconds | 0 |
 |
Ignite Afterburners | Increases this unit's movement speed by 100% for 8 seconds. | 60 seconds | 0 |
Upgrades:
| Upgrade | Name | Effect | Research Time | |
|---|---|---|---|---|
 |
Replenishable Magazine | Allows the Vulture to build additional Spider Mines to replace those used. | 50/50 | 60 seconds |
 |
Cerberus Mine | Increases the blast radius and trigger radius of the Vulture's Spider Mine by 33%. | 100/100 | 60 seconds |
 |
Advanced Optics | Increases the range of all vehicle and ship weapons by 1. | 200/200 | 120 seconds |
 |
Afterburners | Vehicles and ships gain afterburners that increase the unit's movement speed by 100% for 8 seconds upon activation. | 100/100 | 60 seconds |

Siege Tank
- Great defensive unit.
- Defend them with a strong Bio force or Spider Mines.
Skills:
| Skill | Name | Description | Cooldown | Energy Cost |
|---|---|---|---|---|
 |
Ignite Afterburners | Increases this unit's movement speed by 100% for 8 seconds. | 60 seconds | 0 |
Upgrades:
| Upgrade | Name | Effect | Research Time | |
|---|---|---|---|---|
 |
Advanced Siege Tech | Reduces the transformation time of Siege Tanks by 50%. Siege Tanks gain +3 armor in Siege Mode. | 150/150 | 90 seconds |
 |
Advanced Optics | Increases the range of all vehicle and ship weapons by 1. | 200/200 | 120 seconds |
 |
Afterburners | Vehicles and ships gain afterburners that increase the unit's movement speed by 100% for 8 seconds upon activation. | 100/100 | 60 seconds |
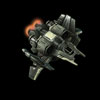
Viking
- Great for anti-air combat.
- "Ripwave Missiles" is a must-get against heavy air compositions.
Skills:
| Skill | Name | Description | Cooldown | Energy Cost |
|---|---|---|---|---|
 |
Ignite Afterburners | Increases this unit's movement speed by 100% for 8 seconds. | 60 seconds | 0 |
Upgrades:
| Upgrade | Name | Effect | Research Time | |
|---|---|---|---|---|
 |
Phobos Weapons System | Viking weapons system upgrade. Increases air attack range by 2 and ground attack range by 1. | 100/100 | 60 seconds |
 |
Ripwave Missiles | Upgrades the Viking's missiles to deal area damage. | 150/150 | 90 seconds |
 |
Advanced Optics | Increases the range of all vehicle and ship weapons by 1. | 200/200 | 120 seconds |
 |
Afterburners | Vehicles and ships gain afterburners that increase the unit's movement speed by 100% for 8 seconds upon activation. | 100/100 | 60 seconds |

Banshee
- Generally not worth making.
- Does great ground DPS, but very fragile.
- Can be used to complement ground forces.
Skills:
| Skill | Name | Description | Cooldown | Energy Cost |
|---|---|---|---|---|
 |
Cloak | Cloaks the unit, preventing enemy units from seeing or attacking it. A cloaked unit will only be revealed by detectors or effects. Cloaked Banshees also have their range increased by 2. Drains 0.9 energy per second. |
0 seconds | 0 |
 |
Ignite Afterburners | Increases this unit's movement speed by 100% for 8 seconds. | 60 seconds | 0 |
Upgrades:
| Upgrade | Name | Effect | Research Time | |
|---|---|---|---|---|
 |
Cloaking Field | Enables Banshees to use the Cloak ability. Cloak renders the Banshee invisible to enemies unless the unit is revealed by detectors or effects. | 100/100 | 60 seconds |
 |
Shockwave Missile Battery | Upgrades the Banshee's attack to fire multiple missile bursts in a straight line. Weapon attacks all targets in a straight line (2 range length) from the Banshee's primary target, dealing 12 weapon damage to all targets within 0.5 range of the line. | 150/150 | 90 seconds |
 |
Advanced Optics | Increases the range of all vehicle and ship weapons by 1. | 200/200 | 120 seconds |
 |
Afterburners | Vehicles and ships gain afterburners that increase the unit's movement speed by 100% for 8 seconds upon activation. | 100/100 | 60 seconds |
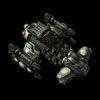
Battlecruiser
- Powerful capital ship.
- High survivability and mobility with Tactical Jump.
- Extremely expensive.
Skills:
| Skill | Name | Description | Cooldown | Energy Cost |
|---|---|---|---|---|
 |
Yamato Cannon | Blasts a target with a devastating plasma cannon, causing 300 damage. | 60 seconds | 0 |
 |
Tactical Jump | Warps to the target location. Battlecruiser is invulnerable while warping. | 60 seconds | 0 |
 |
Ignite Afterburners | Increases this unit's movement speed by 100% for 8 seconds. | 60 seconds | 0 |
Upgrades:
| Upgrade | Name | Effect | Research Time | |
|---|---|---|---|---|
 |
Weapon Refit | Enables use of the Battlecruiser Yamato Cannon. | 150/150 | 90 seconds |
 |
Advanced Optics | Increases the range of all vehicle and ship weapons by 1. | 200/200 | 120 seconds |
 |
Afterburners | Vehicles and ships gain afterburners that increase the unit's movement speed by 100% for 8 seconds upon activation. | 100/100 | 60 seconds |
Build Order
Below is the standard economic build order for Raynor. For more information on how to read and construct your own build orders, please check the Build Order Theory page.
14 Supply Depot
16 Command Center at Rocks
19 Barracks
20 Orbital Command Upgrade
20 Command Center at Rocks
21 Orbital Command Upgrade
21 Refinery
22 Refinery
25 Command Center at Main
Gameplay Guide
Playstyle Traps
A common trap for Raynor players is to try and rush Battlecruisers, given their strength, while either ignoring/using their calldowns inefficiently. This causes them to be extremely weak in the early game.
In order to rush Battlecruisers, players must be familiar with their build order and ensure that they are able to macro up and build their economy. Additionally, they also need to use their calldowns as efficiently as possible (as these calldowns will be the sole damage output from them for a while). In the early phases of the game where only a few Battlecruisers are present, players will need to also actively micro them, to ensure they do not lose any unnecessarily.
An additional note to make is that a player should focus on one type of build, and not hybridize their build unless they intend on playing a long game. This is because when doing a Hybrid build, the player's resources are stretched too thinly and can weaken their entire army. For longer games, players can choose to transition into higher tech units in order to deal with high tech attack waves, such as Reavers and Disruptors.
Playstyle Tips
- Build at least 4 Orbital Command Centers and drop Mules to quickly boost your mineral income.
- Ensure you always have enough energy for Scans, as that will be where most of your detection comes from.
- It is recommended to have at least 5 Barracks in the game if doing a Bio-based build (2 Tech'ed, and 3 Reactor'ed).
- If doing a Bio-based build, spend any floating minerals on more Orbital Command Centers and Barracks. This will allow you to re-max your army almost instantly.
- Take advantage of your calldowns, especially during the early game as you attempt to ramp up.
- Armor upgrades are highly recommended with Raynor due to them being able to increase your units' HP.
- The Hyperion deals roughly 3x more damage while it is moving, at a cost of having a lower range, non-single target attack. Move-command the Hyperion to increase its damage. This is demonstrated in the video below:
- If using Spider Mines for defense, place them on the top of your ramp so they can take advantage of high-ground vision range.


