
Mission: Void Thrashing
Char
Sections on this Page
Mission Summary
Void thrashers are surfacing on Char. Work together and destroy them before Sgt. Hammer's fortress falls to their ruthless assault.
Objectives
Primary Objective
- Kill the Void Thrashers (10)
- Sgt. Hammer's Fortress Must Survive
Secondary Objective
- Destroy the Archangel (1)
Enemy Base Analysis
Change all base analysis pictures to race:
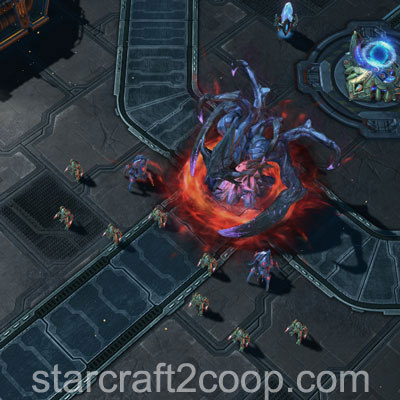
The first Void Thrasher on Void Thrashing is guarded by a very small force of enemy units. This area is shown below.

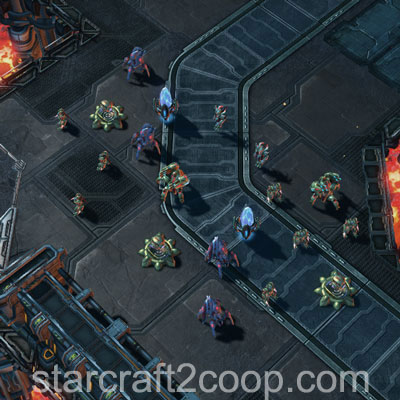
The path to the second set of Void Thrashers is guarded by an enemy camp. This is shown below:

Once the camp has been cleared out, the second Set of Void Thrashers are guarded by a strong enemy force.

Once this set of Void Thrashers are cleared, the third set are also guarded by a camp of enemy units.

Once this camp is cleared, the third Set of Void Thrashers can be cleared.

The Final Set of Void Thrashers are in a heavily fortified enemy base. This is shown below:


Completing the Bonus Objective

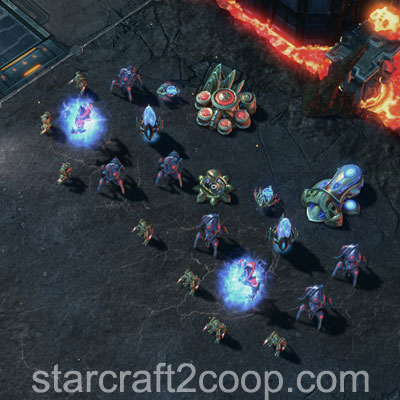
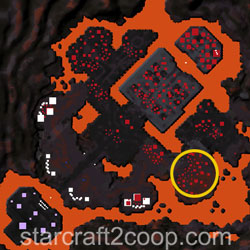
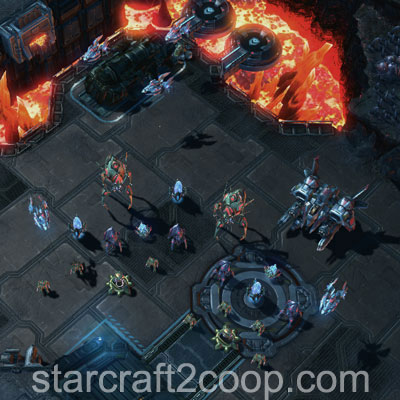
The bonus objective requires you to destroy the Archangel. The Archangel is an enemy unit with an Area-of-Effect attack. The Archangel is guarded by an enemy force, shown below. The bonus objective is always present on the map, so it will trigger whenever a player gets vision or after a certain amount of time has elapsed.

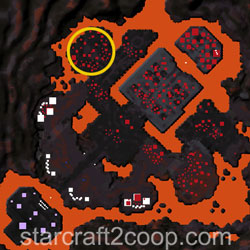
When the Archangel gets to below 50% HP, it will switch to Fighter mode and fly to another area of the map. With high burst damage, it is very possible to destroy the Archangel before it flies away. The below minimap shows where it ends up after flying away.


Note that this can happen several times. The escape location will alternate between the two places until the Archangel is destroyed.
Timings
Note: Information on Tech and Strength levels can be found on the Enemy Compositions page.
Void Thrashers will spawn if the total HP and Shields (vitality) of all units and buildings around the Void Thrashers reaches 50% relative to when the game started.
Additionally, the each set of Void Thrashers will spawn at a given time, regardless of the state of the mission. These timings are:
| Set | Spawn Time |
|---|---|
| 1 | 4:30 |
| 2 | 9:20 |
| 3 | 13:40 |
| 4 | 18:00 |
There are two patterns for attack waves in this mission, with different timings. The Attack Wave Timings for this mission are:
|
Pattern A:
|
Pattern B:
|
If players have not gotten vision of the Archangel after 13:30, the bonus objective will start.
Spawn Points
There are two spawn points for attack waves on this map.
Left Spawn Point (near second set of Void Thrashers):

Right Spawn Point (near bonus area):

Mission Tips
- This mission is very short, and rewards aggressive play because of weak enemy defenses.
Commander-specific Tips
- Abathur: Place Toxic Nests on attack wave spawn locations to weaken them.
- Han & Horner: Place Mag Mines on attack wave spawn locations to weaken them.
- Nova: If you use Siege Tanks, place Spider-mines on attack wave spawn locations to weaken them.
- Raynor: If you use Vultures, place Spider-mines on attack wave spawn locations to weaken them.
- Stukov: Move your Infested Colonist Compound to the first Void Thrasher location after it is killed for quick reinforcements.