Mission: Temple of the Past
Shakuras
Sections on this Page
Mission Summary
The xel'naga temple on Shakuras is under assault. Build your defenses and hold out against the enemy's siege.
Objectives
Primary Objective
- Defend the Temple (26:00)
Secondary Objective
- Destroy the Zenith Stones (3)
Enemy Base Analysis
Change all base analysis pictures to race:
You are not required to push into enemy bases on Temple of the Past. However, it is highly recommend you do so for the following reasons:
- Destroying the enemy bases prevents them from adding static defenses that will eventually creep up to your ramps.
- It allows you to easily access the Void Thrashers that will spawn on the map without losing any troops in the process, especially if you clear it early when the enemy is at its weakest.
- You can spawn-camp attack waves with calldowns to weaken them before you engage them with your main force.
- The bases are very lightly defended and very easy to clear.
There are three bases to clear, one for each of the ramps leading to the temple. These are shown below. Note: These are the starting configurations of the enemy bases. As time progresses in the mission, more static defense will be made. It is best to clear them as quickly as possible.
Middle Base:


Top Base:


Bottom Base:


If you like, you can also clear the base from which the drops come from. However, there is no advantage to doing so, and you will require to fly units over, or warp/teleport them in at that location.


Completing the Bonus Objective


The bonus objective requires you to destroy the three Zenith Stones on the map. Each Zenith Stone is located off each path leading to the temple. The locations are shown below:

The Zenith Stones are present from the start of the game. They will be revealed to the player either when the player gets within 15 range of any of the stones or when 9 minutes have elapsed. There is no time limit to destroy the stones. The stones are guarded by a very small force. Additionally, they will cast Psionic Storms in random areas around them when their HP drops to below 50%.
Timings
Note: Information on Tech and Strength levels can be found on the Enemy Compositions page. If Strength and Tech levels differ between attack waves occurring at the same time, they will be separated with commas respectively.
There are two patterns on this mission. The patterns are shown below. Attack directions show you to direction the attack wave moves in.
|
Pattern A: This will come with an attack warning at 3:15
|
Pattern B: This will come with an attack warning at 3:10
|
Some attack waves will also have Hybrids in them. The types of these Hybrids will depend on the enemy race as well as the pattern, as follows:
| Pattern A | Pattern B | ||||
|---|---|---|---|---|---|
| Race | Minor Hybrid | Major Hybrid | Race | Minor Hybrid | Major Hybrid |
| Protoss | Hybrid Reaver | Hybrid Behemoth | Protoss | Hybrid Nemesis | Hybrid Dominator |
| Terran (50%) | Hybrid Destroyer | Hybrid Behemoth | Terran (50%) | Hybrid Nemesis | Hybrid Behemoth |
| Terran (50%) | Hybrid Reaver | Hybrid Dominator | Terran (50%) | Hybrid Nemesis | Hybrid Dominator |
| Zerg | Hybrid Destroyer | Hybrid Dominator | Zerg | Hybrid Nemesis | Hybrid Behemoth |
Spawn Points
There are two types of spawn points of interest in this mission:
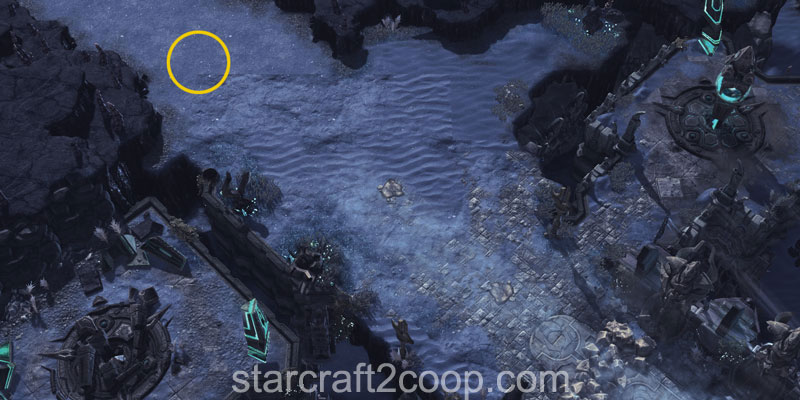
- Attack Wave Spawn Points: These are where the Attack Waves that travel towards the temple spawn. There are four spawn points, one for each side of the temple (three ramps and one drop attack).
- Drop/Warp-in Locations: These are part of the mid-game where Terran/Zerg forces will drop and Protoss forces will warp in. There are four possible drop/warp-in locations.
Top Attack Wave Spawn Point:

Middle Attack Wave Spawn Point:

Bottom Attack Wave Spawn Point:

Drop Attack Wave Spawn Point:

The locations for Drop Attacks and Warp-ins are shown below:

Mission Tips
- Try to clear the enemy bases around the map as early as possible to simplify the mission.
- Build anti-air defenses and (if applicable) place Overlords around the temple when playing against Zerg compositions with Scourge to prevent them from targeting the temple.
Commander-specific Tips
- Abathur: Place Toxic Nests in front of the rocks on the middle lane to kill the early attack waves and stall them before they break the rocks.
- Abathur: Place Toxic Nests on attack wave spawn locations to weaken them.
- Dehaka: Get early Essence by killing the enemies at each of the Zenith Stones. Use Deep Tunnel or jump over the rocks to access them.
- Han & Horner: Place Mag Mines in front of the rocks on the middle lane to kill the early attack waves and stall them before they break the rocks.
- Han & Horner: Place Mag Mines on attack wave spawn locations to weaken them.
- Nova: If you use Siege Tanks, place Spider-mines on attack wave and Thrasher spawn locations to weaken them.
- Raynor: If you use Vultures, place Spider-mines on attack wave and Thrasher spawn locations to weaken them.
