Commander: Kerrigan
Queen of Blades
Sections on this Page
Commander Summary
Kerrigan dominates the battlefield with her aggressive abilities combined with some classic Zerg units.
Level Unlocks
| Level/Icon | Name | Description |
|---|---|---|
 |
Mutating Carapace | Kerrigan gains temporary life as she deals damage. If killed, she is revived quickly at her Hatchery. |
 |
Immobilization Wave | Unlocks Kerrigan's Immobilization Wave ability, which damages and stuns enemies in a large area around her. |
 |
Ruthlessness | Increases the damage of Kerrigan's Leaping Strike by 150 to 300 and its cast range from 6 to 12. Increases the damage of Psionic Shift from 50 to 100. |
 |
Spawning Pool Upgrade Cache |
Unlocks the following upgrades at the Spawning Pool:
|
 |
New Unit:Lurker |
Area-damage ambusher. Must burrow to attack. Morphed from Hydralisks. Can attack ground units. |
 |
Hydralisk & Lurker Upgrade Cache |
Unlocks the following upgrades at the Hydralisk Den and Lurker Den:
|
 |
Malignant Creep |
All friendly ground units gain increased attack speed (by 30%) and life regeneration (by 1HP/s for Zerg Units) while on creep. Creep tumors spread creep faster and farther. Passive ability. |
 |
Omega Worm | Upgrades the Nydus Network to the Omega Network, which can summon Omega Worms. Omega Worms cost no resources, unload units instantly, and can also be used by your ally. |
 |
Kerrigan Upgrade Cache |
Unlocks the following upgrades at the Evolution Chamber:
|
 |
Fury |
Kerrigan's attack speed increases by 10% with each attack, up to a maximum of 50%. Passive ability. |
 |
Spire Upgrade Cache |
Unlocks the following upgrades at the Spire and Greater Spire:
|
 |
Zergling Evolution: Raptor |
Upgrades Zerglings to the Raptor strain. Fast melee unit. Leaps over obstacles and onto targets from range. Deals increased damage. Can attack ground units. |
 |
Ultralisk Upgrade Cache |
Unlocks the following upgrades at the Ultralisk Cavern:
|
 |
Ultralisk Evolution: Torrasque |
Evolves Kerrigan's ultralisks into the Torrasque strain. Heavy assault beast. Has an area-damage cleave attack. When killed, can be revived. Can attack ground units. |
 |
Queen of Blades | Increases Kerrigan's energy regeneration by 50%. |
Highlighted rows denote large power spikes for the commander.
Achievements
The commander-specific achievements for Kerrigan are:
| Achievement | Name | Description |
|---|---|---|
 |
In the Name of Love | Stun 5,000 enemy units with Kerrigan's Immobilization Wave in Co-op Missions. |
 |
Make It Rain | Generate 50,000 resources for your ally with Kerrigan's Assimilation Aura in Co-op Missions. |
 |
Now I Am Become Death... | Kill 100 units with Kerrigan in a single mission on Hard difficulty. |
 |
Walking Dead | Kill 50 units with Kerrigan's Leaping Strike in a single mission on Hard difficulty. |
Sub-Ascension Leveling
Difficulty: Easy
Kerrigan (the hero unit) is extremely powerful, so utilize her as much as possible. Your army composition should be mass Hydralisk, with Nydus (and then Omega) worms to reinforce. Until you get Omega worms, place Nydus worms further away from where you are taking an engagement, as it will be used to reinforce your army a lot slower than usual.
While leveling through Mastery levels, allocate points into Power Set 1's Energy Regeneration mastery until you hit the desired number of points, before allocating them to Attack Damage.
Masteries
Below are the three Power Sets for Kerrigan with the recommended point allocations for each. Note that these are meant to serve a general, all-purpose build that is effective across all maps with no Prestiges selected. You are highly encourged to change these masteries to suit your playstyle and particular challenges you face (e.g. Weekly Mutations).
Power Set 1:
| Power | Value | Recommended Points to Add | Further Considerations |
|---|---|---|---|
| Kerrigan Energy Regeneration | 1.5% per point 45% maximum |
22 | Both these masteries can help Kerrigan in different ways and it is up to you to determine how to allocate them. If you find that you are lacking energy, put a few more points into the Energy Regereration mastery. |
| Kerrigan Attack Damage | 1 per point 30 maximum |
8 |
This is a matter of preference. The 22/8 split allows Kerrigan to 3-shot Banshees with her auto-attack. A 28/2 split will allow her to 3-shot Mutalisks.
Power Set 2:
| Power | Value | Recommended Points to Add | Further Considerations |
|---|---|---|---|
| Combat Unit Vespene Gas Cost | -1% per point -30% maximum |
? | Both these masteries are great, and the point allocation depends on the playstyle. A possible split is 11/19, which will allow Immobilization Wave to 1-shot units like Banshees and Swarm Hosts. |
| Augmented Immobilization Wave | 3.33% per point 100% maximum |
? |
This is a matter of preference depending the playstyle. For solo Kerrigan builds, the Immobilization Wave mastery is great. Otherwise, the Combat Unit mastery will make your units very cheap to produce.
Power Set 3:
| Power | Value | Recommended Points to Add | Further Considerations |
|---|---|---|---|
| Expeditious Evolutions | -2% per point -60% maximum |
29 | Generally, the Evolutions mastery is very important. However, possible scenarios can arise where you'd want to increase Kerrigan's Primary Ability damage and attack speed, such as some mutators. |
| Primary Ability Damage and Attack Speed | 1% per point 30% maximum |
1 |
Reducing the cost and research time of evolutions allows you to get "Ability Efficiency" as quickly as possible, improving Kerrigan's power level. The 1 point into the Primary Ability improvement allows you to two-shot burrowed Lurkers.
Prestiges
Below are the prestiges for Kerrigan. Note that "Effective Level" is the level at which the prestige achieves it full effect.
| P1: Malevolent Matriarch | |
| Advantages |
|
|---|---|
| Disadvantages |
|
| Notes |
|
| Effective Level | 7 |
| Advice | This prestige is a prestige that sacrifices mobility for better creep effectiveness. It works by improving the effectiveness of both you and your ally's units by providing them with extra attack speed, healing and map vision. If using this prestige, it is much better to spread Creep using other Creep Tumors than planting new ones. Newly-planted Creep Tumors build much slower than ones that are spread. This prestige comboes well with partners who can spread creep more easily, such as Stukov and Abathur. |
Effectiveness Bonuses:
- Attack speed bonus doubled (to +60%)
- Life regeneration rate bonus doubled (to 2HP/s)
- Creep Tumor Build Range increased by 3
- Creep Tumor Vision Range increased by 3
- Creep Spread Range increased by 3
- Creep Spread Speed doubled
| P2: Folly of Man | |
| Advantages |
|
|---|---|
| Disadvantages |
|
| Notes |
|
| Effective Level | 10 |
| Advice | This prestige works well when pushing into enemy bases with Kerrigan. It allows Kerrigan to not only deal damage to enemy units effectively, but also stun enemy units, allowing you to unload units from Nydus worms without getting abilities casted on them. It works better with low numbers of high-HP units, rather than a large numbers of low-HP units. It noticeably slows Kerrigan's ability to focus down buildings. |
Fury Stack Mechanics:
Every auto-attack provides you with one Fury stack, up to a maximum of 5 stacks. Each also increases your attack speed by 10%. If Kerrigan does not auto-attack for 5 seconds, her Fury stacks will disappear.
When either Leaping Strike or Psionic Shift are used, all Fury stacks are expended. Each stack will search for a number of targets as per the table below. The targets selected between stacks may be the same, but each stack may not select the same target. 50 damage is dealt to each of the selected targets. Detection is not required to hit a target.
| Stack # | Targets |
|---|---|
| 1 | 1 |
| 2 | 2 |
| 3 | 3 |
| 4 | 6 |
| 5 | 12 |
This implies two things:
- The theoretical maximum amount of damage that can be dealt to a single target is 250 damage. This is caused by each stack selecting that target.
- The theoretical maximum number of units that can be hit is 24 units. This is caused by each stack selecting different targets from the other stacks.
| P3: Desolate Queen | |
| Advantages |
|
|---|---|
| Disadvantages |
|
| Notes |
|
| Effective Level | 1 |
| Advice | This prestige replaces Leaping Strike with an equivalent ability that can also hit air. However, it comes at a cost of losing Psionic Shift (a stronger AoE option), and the ability to use Leaping Strike and Psionic Shift for mobility. Crushing Grip has a very small area-of-effect size (1.75 radius), which means she cannot hit as many units as Psionic Shift theoretically can. But the ability to stun units in that area is invaluable. Be careful when using Immobilization Wave with Crushing Grip, because they can overwrite each others stun durations. The double Assimilation Aura drops noticeably improve ramp-up time. |
For general play, P0 (no prestige, Queen of Blades), P2 (Folly of Man), and P3 (Desolate Queen) are recommended. P3 has a better match-up against air (a general Kerrigan weakness) but a worse match-up against early-game hordes. P2 provides the player with a good long-range damage as long as Kerrigan is able to build up Fury stacks and not take engagements against several enemy units in close proximity, but some find it less beginner friendly. It allows Kerrigan to more effectively clear enemy bases and keep her army alive.
Hero Unit
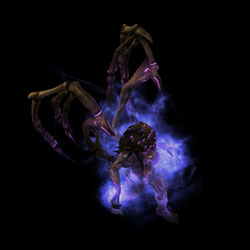
Spawn time: 4:00
Respawn time: 1:00
The abilities for Kerrigan are:
| Ability | Name | Description | Cooldown | Energy Cost |
|---|---|---|---|---|
 |
Leaping Strike | Kerrigan leaps to her target and deals 300 damage. Can be used without a target to travel quickly. | 0 seconds | 50 |
 |
Psionic Shift | Kerrigan dashes through enemies, dealing 100 damage to all enemies in her path. | 0 seconds | 50 |
 |
Assimilation Aura | Causes all nearby enemies to drop resources when killed. Effect lasts for 15 seconds. | 120 seconds | 0 |
 |
Immobilization Wave | Deals 100 damage to enemies in a large area around Kerrigan (27 range) and stuns them for 10 seconds. Heroic units are slowed. |
Coolup: 600 seconds Cooldown: 180 seconds |
0 |
Selecting the Desolate Queen prestige replaces your hero unit with a new hero unit. This unit has abilities itself, shown below:

| Ability | Name | Description | Cooldown | Energy Cost |
|---|---|---|---|---|
 |
Kinetic Blast | Kerrigan deals 300 damage to target unit or structure from long range. | 0 seconds | 50 |
 |
Crushing Grip | Enemies in target area are stunned and take 50 damage over 5 seconds. Heroic units are slowed. | 0 seconds | 75 |
 |
Assimilation Aura | Causes all nearby enemies to drop resources when killed. Effect lasts for 15 seconds. | 120 seconds | 0 |
 |
Immobilization Wave | Deals 100 damage to enemies in a large area around Kerrigan and stuns them for 10 seconds. Heroic units are slowed. |
Coolup: 600 seconds Cooldown: 180 seconds |
0 |
The upgrades for Kerrigan are:
| Upgrade | Name | Effect | Research Time | |
|---|---|---|---|---|
 |
Heroic Fortitude | Kerrigan gains +200 maximum life. Life-regeneration rate increased by 100%. |
100/100 | 60 seconds |
 |
Chain Reaction | Kerrigan's attacks deal normal damage to her target then jump to additional nearby enemies. Deals 10 damage to up to four additional targets. | 150/150 | 90 seconds |
 |
Ability Efficiency | Kerrigan's ability costs and cooldowns are reduced by 20%. | 200/200 | 120 seconds |
Recommended Army Composition
The recommended army composition for Kerrigan is below. Note that this assumes no Prestige talent selected and recommended Mastery Allocations. This is a basic recommendation for your army framework. It is recommended to gain an understanding for each of the units in the Units section and further add tech units so that you are able to better handle the situations you face.
Mass Hydralisk builds work very well for Kerrigan because of their large amounts of burst potential from their Frenzy, when they are unloaded from Omega Worms.
Add Lurkers to your army composition when you need to defend at particular choke points.
Combat Units
For more information on Kerrigan's unit stats, comparison between units and upgrade calculations, visit the Data Tables page.
Kerrigan's combat units are listed below:
Queen
- Can be used for Larva injects and spreading Creep.
- Generally not recommended for creep spread due to Omega Worms.
Skills:
| Skill | Name | Description | Cooldown | Energy Cost |
|---|---|---|---|---|
 |
Spawn Creep Tumor | A burrowed creep generator. Creep feeds nearby Zerg structures. A Creep Tumor can spawn additional Creep Tumors. Bonus: Zerg move faster on creep. |
15 seconds | 25 |
 |
Spawn Larva | Target Hatchery, Lair, or Hive spawns 4 Larvae in 40 seconds. | 25 seconds | 0 |
 |
Transfusion | Instantly restores 125 life to target biological unit or structure. | 0 seconds | 50 |
Upgrades: None
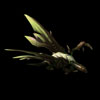
Zergling
- Usually used to clear expansion.
- Can be used to clean up enemy units after an area has been cleared.
Skills: None
Upgrades:
| Upgrade | Name | Effect | Research Time | |
|---|---|---|---|---|
 |
Metabolic Boost | Increases the movement speed of Zerglings by 60%. | 100/100 | 60 seconds |
 |
Hardened Carapace | Zerglings gain +10 maximum life. | 150/150 | 60 seconds |
 |
Adrenal Overload | Increases the attack speed of Zerglings by 40%. | 150/150 | 60 seconds |
 |
Shredding Claws | Zergling attacks reduce their target's armor to 0 for 10 seconds. | 150/150 | 90 seconds |

Hydralisk
- Does extremely high DPS.
- Great anti-air choice.
- Fragile unit that needs to be guarded by a more powerful frontline.
Skills:
| Skill | Name | Description | Cooldown | Energy Cost |
|---|---|---|---|---|
 |
Frenzy | Attack speed increased by 50% for 15 seconds. | 30 seconds | 0 |
Upgrades:
| Upgrade | Name | Effect | Research Time | |
|---|---|---|---|---|
 |
Muscular Augments | Improves Hydralisk movement speed by 25% and increases attack range by +1. | 150/150 | 60 seconds |
 |
Ancillary Carapace | Hydralisk gains +20 maximum life. | 150/150 | 90 seconds |
 |
Frenzy | Increases the attack speed of Hydralisks by 50% for 15 seconds. | 200/200 | 120 seconds |

Lurker
- Does damage in a straight line, making it a great defensive unit.
- Range upgrade makes it significantly better than most other defensive units.
Skills: None
Upgrades:
| Upgrade | Name | Effect | Research Time | |
|---|---|---|---|---|
 |
Seismic Spines | Increases the attack range of Lurkers by +3. | 200/200 | 120 seconds |
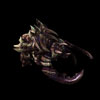
Ultralisk
- Great tank for more fragile units.
- Usually not recommended to mass them due to them body-blocking each other.
Skills:
| Skill | Name | Description | Cooldown | Energy Cost |
|---|---|---|---|---|
 |
Burrow Charge | Ultralisk burrows and charges toward units. When the Ultralisk unburrows, all enemy units nearby are knocked back and stunned for 2 seconds. | 10 seconds | 0 |
Upgrades:
| Upgrade | Name | Effect | Research Time | |
|---|---|---|---|---|
 |
Chitinous Plating | Grants Ultralisks +2 armor. | 100/100 | 60 seconds |
 |
Burrow Charge | Allows Ultralisks to use the Burrow Charge ability. | 150/150 | 60 seconds |
 |
Tissue Assimilation | Grants Ultralisk's life equal to 40% of all damage dealt from normal attacks. | 150/150 | 60 seconds |
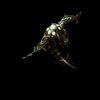
Mutalisk
- Powerful unit that can target both air and ground units.
- Bouncing glaives can obliterate enemy attack waves.
- Extremely fragile and susceptible to splash damage.
Skills: None
Upgrades:
| Upgrade | Name | Effect | Research Time | |
|---|---|---|---|---|
 |
Rapid Regeneration | Mutalisks regenerate life quickly while out of combat. | 150/150 | 60 seconds |
 |
Vicious Glave | The Mutalisk's attack bounces three additional times, hitting up to six targets. Bounces also travel farther. | 150/150 | 90 seconds |
 |
Severing Glave | The Mutalisk's attack no longer decreases in damage with each subsequent bounce. | 200/200 | 120 seconds |
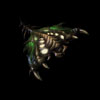
Brood Lord
- Generally not recommended to be used because it's fragile and expensive.
- Other units can fill its role much more effectively.
Skills: None
Upgrades:
| Upgrade | Name | Effect | Research Time | |
|---|---|---|---|---|
 |
Porous Cartilage | Increases Brood Lord movement speed by 75% and life by 100. | 150/150 | 60 seconds |
Build Order
Below is the standard economic build order for Kerrigan. For more information on how to read and construct your own build orders, please check the Build Order Theory page.
14 Overlord
14 Macro Hatchery at Rocks
19 Extractor
21 Extractor
24 Macro Hatchery at Rocks
28 Spawning Pool
33 Overlord
Kerrigan -> Rocks
Gameplay Guide
Playstyle Traps
None
Playstyle Tips
- Ability Efficiency works on all of Kerrigan's abilities, including Immobilization Wave.
- Kerrigan is extremely powerful, especially in the early game. Make sure she's always on the battlefield.
- Use Assimilation Aura as soon as you can. It can propel your economy forward.
- Omega Worms give Kerrigan unmatched mobility. At the very minimum, you should have two worms built, and hotkeyed for use.
- Use Omega Worms for detection and for spreading creep around the map.
- Loading units into Nydus/Omega Worms will prevent them from taking DoT (damage over time) damage.
- Units inside the Worms still gain the Malignant Creep HP regeneration buff.
- Immobilization Wave has a range larger than the screen width. Make sure you position Kerrigan accordingly for maximum value.
- Immobilization Wave decloaks any targets hit by it.
- The first two upgrades you must get are "Heroic Fortitude" which increases Kerrigan's HP and "Ability Efficiency" which reduces Kerrigan's cooldowns.
- Kerrigan's Creep bonuses applies to all creep, including Stukov's automatic creep spread.
- Use Queens to Transfuse Kerrigan to increase uptime of the Hero unit, especially during Hero solos.
- Kerrigan's Psionic Shift does not need detection to damage cloaked or burrowed targets.
